
A practical guide from Packaging in Time to help you choose better materials, structure, printing, and finishing for custom boxes.

Custom Tray and Sleeve Boxes Uses Materials and Design Guide
Custom tray and sleeve boxes use two separate parts: an inner tray that holds the product and an outer sleeve that slides over it. The structure creates a deliberate reveal without the complexity of a rigid lid-and-base box.
It can work for cosmetics, small electronics, food gifts, accessories, stationery and product sets where the opening action supports the brand experience. The tray gives the product a defined home; the sleeve gives the pack a clean exterior for artwork, product information and a campaign message. The format is useful when both those jobs matter.
A tray and sleeve box should be specified around the real product, not an attractive mock-up. The product has to fit the tray, the sleeve needs to slide smoothly without falling off, and any insert, tissue, pull ribbon or divider must work with the intended opening.
The box also needs a defined package role. It may be a consumer-facing retail carton or gift layer, while a separate shipper protects it through delivery. Treating those layers separately prevents a sleeve structure from being asked to provide a level of parcel protection it was not designed to provide.
What is a tray and sleeve box
The tray is an open-top component that supports the product. The sleeve is a printed cover that surrounds some or all of that tray. A customer slides the tray from the sleeve to reach the item.
The tray may be made from folding carton board, rigid board or another suitable construction; the sleeve can be a printed paperboard wrap or cover. The exact material depends on the product weight, size, desired finish, assembly method and route to customer. The name describes the relationship between the two parts, not one fixed board grade or protection level.
This format differs from a two-piece lid-and-base box because the sleeve remains around the tray rather than being lifted off as a separate lid. It differs from a mailer because its primary role is presentation and product access rather than a parcel-ready closure.
It can be simple and flat-packed for a light retail item, or more structured for a premium gift set. The best choice depends on whether the product needs a controlled reveal, a visible outer panel, a reusable tray, an insert or a compact shelf-facing presentation.
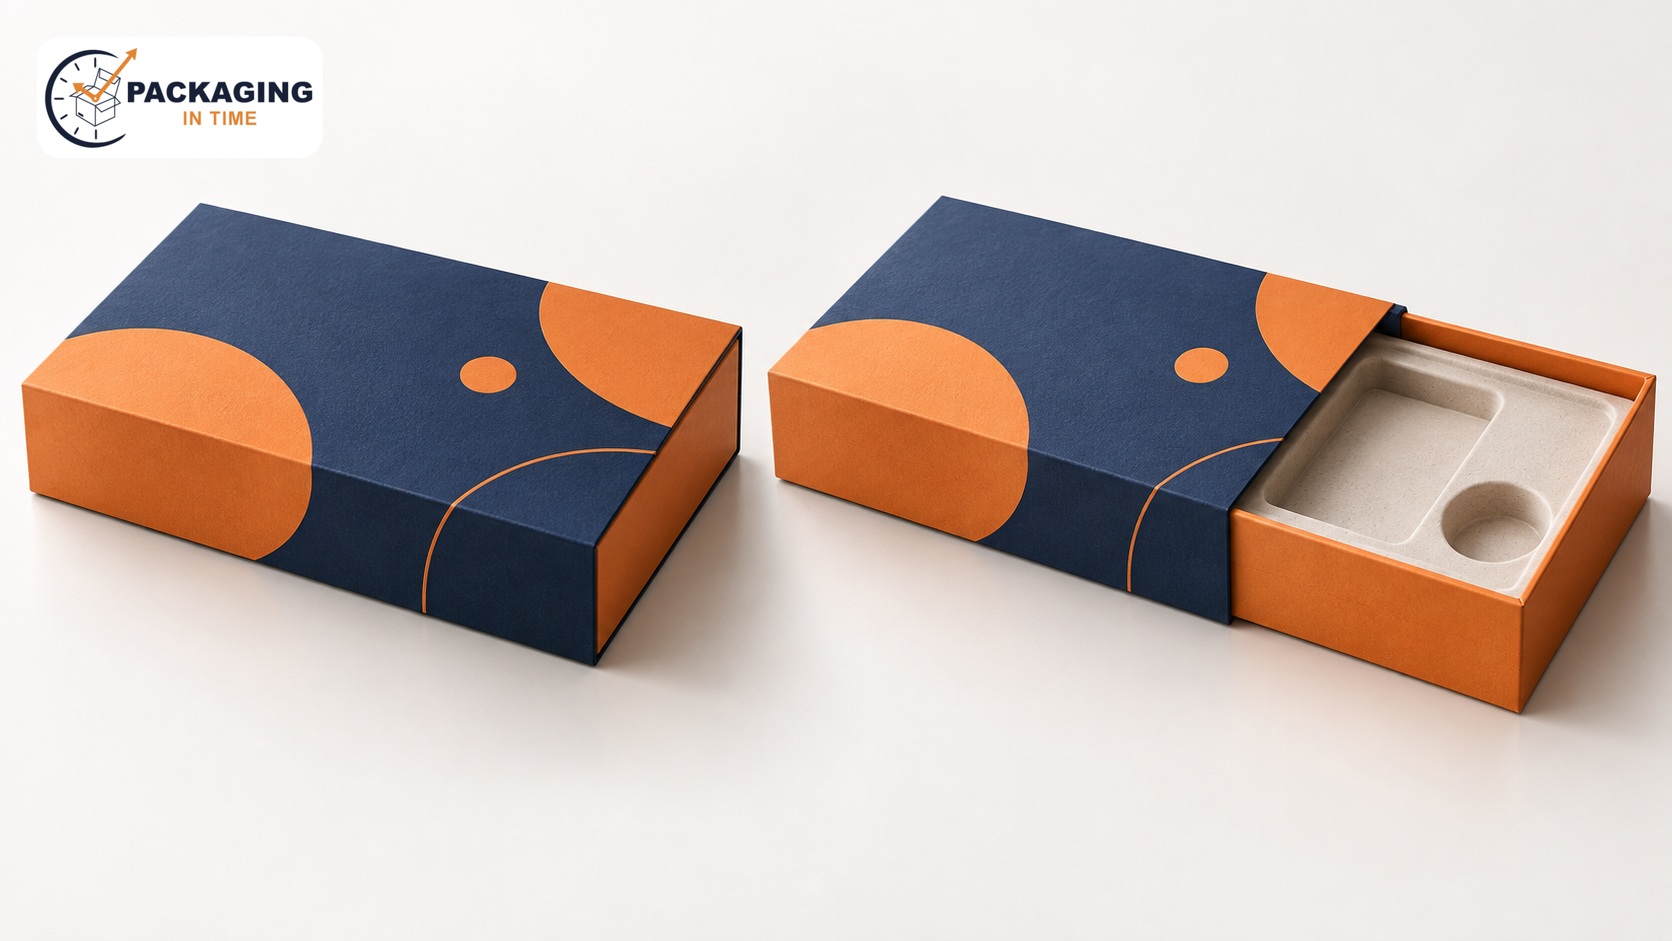
Tray-and-sleeve structure: the sleeve presents the product while the tray supports the opening reveal.
When the format is a good fit
Tray and sleeve packaging suits products that benefit from an opening sequence but do not require a fully enclosed rigid gift box. It works well when a product needs to be held in a tray, shown in a stable orientation and revealed after a sleeve is removed.
Examples include a skincare set, stationery kit, accessory collection, tea assortment, candle accessory set or small electronics bundle. The sleeve can carry branding and variant cues while the tray creates the first view of the product. This makes the structure useful for gifting, premium retail and launch campaigns.
It is less suitable where the product is very heavy, irregular, fragile without an insert, exposed to moisture or expected to move through a demanding parcel route without an outer shipper. A loose tray can slide out during handling if the sleeve fit is not controlled, and a product can shift if the tray has no retention feature.
Products that need a simple high-volume retail carton, extensive panel information or a self-locking shipping closure may be better served by a different structure. Use the opening experience as a reason to choose the format, not only its visual appearance.
Tray size, sleeve coverage and product fit
Start with the finished product dimensions, weight, sensitive surfaces and preferred orientation. Add the dimensions of any product carton, backing card, cable, pouch, tissue or insert. The inner tray needs enough clearance for packing and removal, but too much clearance lets the product move.
The outer sleeve then needs enough space to slide over the tray with its wrapped or printed surface in place. A sample is important because board thickness, fold lines, seam position and finishing can alter the actual fit more than a flat drawing suggests.
Decide how much of the tray the sleeve should cover. A short sleeve can expose a contrasting tray color and create a strong reveal. A deeper sleeve can provide more protection and more exterior print area.
The choice affects where a customer grips the tray, how much product is visible before opening and how well the pack stays together in a shelf stack. Check the product and sleeve in the actual retail orientation.
A sleeve that looks balanced on a table may cover the wrong part of the product when the pack sits behind a shelf lip.
Opening experience and pull features
The opening should feel controlled. Customers need an obvious place to grip the tray, a sleeve that slides smoothly and enough resistance that the tray does not fall out when the box is lifted. A thumb notch, exposed tray edge, pull ribbon or die-cut finger feature can help.
Each one should be evaluated with the product in place. A ribbon can improve a premium reveal but needs a defined position and packing step. A notch can make access easier but removes board from a tray edge. Select the simplest feature that improves real use.
Test the full sequence: pick up the closed pack, remove the tray, lift the product, return the product if relevant and close the sleeve again. Look for scuffing on the sleeve, product rubbing, tray sag, insert movement and whether a customer must force the pack open.
If the product is intended to be removed only once, optimize the first opening. If the box may be retained, test repeat use. The goal is a clear experience, not a dramatic opening that makes production or handling unreliable.
Materials, inserts and product retention
Folding carton board can suit light tray-and-sleeve packs that need good print quality and flat shipment. Rigid board can create a more substantial presentation, but it changes storage, assembly and shipping considerations. The right material depends on tray span, product load, sleeve coverage, finish and how the pack reaches the customer.
A description such as premium or eco-friendly is not a material specification. Ask what board, wrap, print and support system are required for the actual dimensions and load.
Use an insert only when it solves a product-control problem. A simple paperboard platform can keep a small product centred. A divider can separate multiple items. A fitted cavity can keep a fragile component from moving.
Inserts should be designed from the actual product, including labels and closures, then tested in the tray. An insert that holds a product perfectly in a rigid mock-up can be difficult to pack or can make the sleeve too tight once the final board and wrap are used.
Choose the structure around the product job
The easiest way to specify this format is to decide what the packaging must do before deciding what it should look like. A light, boxed skincare pair may need a printed sleeve, a shallow folded tray and a paperboard platform that keeps both units facing forward.
A premium stationery set may need a deeper tray, a sleeve that exposes a coloured tray edge and a divider that stops pens from crossing over the notebook. A small electronic accessory may need a more secure insert and a separate protective shipper. The same visible structure can therefore have very different production details.
Packaging objective | Useful tray-and-sleeve response |
|---|---|
A quick branded reveal | Use a sleeve with a clear exposed tray edge and an easy grip point. |
Several small items in one pack | Use a tray with dividers or a platform so the set stays arranged. |
A fragile product | Add a tested retention or cushioning solution and a suitable outer shipper. |
A retail-ready collection | Keep SKU cues, product orientation and scanning area visible in the closed state. |
A reusable presentation pack | Test repeated opening, sleeve scuffing and tray strength with the final components. |
Avoid solving every product job with a heavier construction. A heavier tray may improve the feel in hand but add cost, storage volume and assembly time. A larger sleeve can increase the print canvas but make the pack less stable in a shelf stack.
An elaborate insert can create a premium first impression but slow packing and make product changes difficult. A good specification identifies the minimum structure that gives the product the intended fit, reveal and retail presentation. The sample then confirms whether that balance works in the real configuration.
Structural details that change how the box performs
Tray depth affects both product containment and how much of the tray remains visible once the sleeve is on. A shallow tray can make removal easy and keep the overall profile compact. A deeper tray can support taller products, but it can also make a short sleeve feel loose or leave less grip area.
The tray corners, base panel and side walls need to suit the product load. A tall, narrow tray may flex differently from a wide, low tray even if both use the same board. Share the product weight and its center of gravity when requesting a recommendation.
Sleeve overlap is the part of the sleeve that covers the tray when the pack is closed. More coverage can make the set feel contained and create more printable surface; less coverage can create a stronger reveal.
It also affects retention. If the sleeve is too loose, the tray can move during handling. If it is too tight, staff and customers may struggle to open it or scuff the printed surface. Friction is influenced by the board, wrap, coatings, seam, product load and environmental conditions. That is why a physical sample is more useful than judging a gap in a digital drawing.
The glue seam belongs in the structural and artwork review. It may run along a side panel, the back or another chosen area depending on the construction. Position it away from a key visual where possible, and allow for the way a seam can affect thickness and slide.
Fold direction also matters. Paperboard has a grain direction that can influence folding and resistance, while a wrapped rigid component has its own corner and wrap behavior. A packaging supplier can advise on practical construction, but only after the finished size, opening direction and material are known.
Decide early whether the tray and sleeve will be delivered flat or assembled. Flat delivery can reduce storage and transport volume, but it moves assembly into the packer’s workflow. A pre-assembled solution can save packing time but takes more space.
If the product is inserted manually, test the sequence with the intended staff, gloves, tissue, labels and any tamper feature. A structure that is easy to assemble on one sample can still introduce variation when hundreds of units are packed in a production environment.
Artwork, finish and brand hierarchy
Use the closed sleeve as the first-view panel. It normally needs the brand, product family, variant cue and any priority information that helps a retailer or customer identify the pack. The tray may carry a supporting color, an interior pattern, a short message or a secondary brand element.
Keep the hierarchy simple: the sleeve should identify the product without requiring a customer to open it, while the tray can reward the opening action. If every panel carries a competing message, the reveal becomes busy rather than intentional.
Finish choices should serve the surface and handling pattern. A matte sleeve may support a quiet, tactile appearance, while gloss can emphasise color and image reproduction. Soft-touch, foil, embossing, debossing or spot treatment may create contrast, but each changes production, scuff behavior, lead time or cost.
Select a finish for a specific visual or tactile role and place it where a customer will notice it. Do not put a delicate effect on an edge that will repeatedly rub against a shelf, another pack or the tray during opening without checking a finished sample.
Use the final dieline as the source of truth for artwork. Keep important copy, logos, QR codes and barcodes within the approved safe areas. Bleed needs to extend beyond trim where color or an image reaches an edge.
A sleeve has folds, a seam and areas of stress that are not obvious on a front-panel visual. A preproduction proof helps confirm wording and color direction; it does not by itself prove the slide, board feel, shelf wear or product fit. Review the art on the assembled sample before approving production.
Sampling and approval process
A useful sample answers defined questions. Confirm the tray internal dimensions, sleeve slide, product retention, opening direction, print position, finish, barcode scan area, packing sequence and outer-shipping arrangement. Give each reviewer a role: brand can assess hierarchy and finish, product teams can assess fit and removal, operations can assess packing, and retail teams can assess the closed presentation.
Recording decisions against the same sample reduces the risk that a later approval changes one element without considering its effect on the whole system.
Use the actual saleable product wherever possible. A placeholder with different height, weight, label texture or closure can produce misleading results. If the product is not available, record precisely what has been assumed and repeat the check once the final item is ready.
The same discipline applies to inserts, tissue, seals and accessories. A sleeve that slides correctly around an empty tray may bind once the final item slightly expands the tray walls, or it may become loose after a surface coating is changed.
Before production, make sure the approval record specifies the item that was reviewed: tray size, sleeve dimensions and coverage, board or rigid construction, print files, finish, insert, pull feature, quantity and packing method. It should also identify any outer case or parcel pack that was not part of the retail box itself.
This makes a re-order, product variant or future seasonal refresh more manageable because the packaging team can see which elements are fixed and which can change.
Practical applications by product category
For skincare, the tray can group a serum, moisturiser and applicator into a stable routine set while the sleeve presents the range name and variant. Measure every finished component, including caps and pumps, because a small height change can alter the tray depth or the way the sleeve slides.
If units have glass containers, use an insert or divider that prevents them touching one another, then put the presentation pack into an outer shipper suited to the delivery route. The sleeve can communicate the set; the individual products should still carry their own product-specific information.
For tea, coffee and confectionery gifts, tray and sleeve packaging can organize several sealed items into a defined collection. The tray helps keep flavours, sachets or boxes in the intended order; the sleeve gives the collection a single retail face.
The pack should not be assumed to provide a food-contact barrier simply because it is made from board. Identify whether the food is fully sealed, whether any component directly contacts food, and what documentation or compliance review the particular materials require. Also check that the pack can be opened without crushing inner cartons or pouches.
For jewellery and accessories, a small tray can give a product a precise presentation position. The sleeve can be used as a discreet outer brand layer, while an insert stops a pendant, watch strap or small accessory from moving.
With small products, avoid oversized external dimensions that make the pack feel empty. A shallow tray, insert and short sleeve may give a more proportionate experience. If the pack is used as a gift box, test the opening with tissue, care card and any protective pouch present, not with the item alone.
For electronics, cables and accessories, specify the weight distribution, sharp corners, charging components and any separately packed instructions. A tray may keep a device visually centred, but it may not be enough to protect it from transit shocks.
Add retention only where it has a defined job, and place the retail pack inside the appropriate outer transport packaging. The sleeve can be valuable for product-family branding and a clean retail face, but labels, serial information or retailer-required details need a stable and accessible location in the full packaging system.
For stationery, cards and small homeware, a tray-and-sleeve format can create an orderly unboxing moment without requiring an elaborate construction. Consider how a customer removes flat items such as cards or notebooks: a tray that is exactly flush with the product may look clean but be difficult to grip.
A small finger space, ribbon or removable top layer can make the product accessible. Test the finished set after it has been stacked, transported and handled, because corners and print faces can wear differently from an individual studio sample.
Cost, quantity and lead-time considerations
A tray and sleeve price is influenced by more than its finished dimensions. The two components may have separate die-cutting, printing, assembly and packing requirements. Material construction, print coverage, number of colors, finishes, foil or embossing, insert complexity, hand assembly, order quantity and destination can all affect the proposal.
A very short sleeve may use less board than a full sleeve, but it may require more careful tray alignment. A multi-part gift set can increase pack-out time even when the tray and sleeve are simple by themselves.
Quantity affects production efficiency, but it is not a substitute for a complete specification. A supplier needs the same essential inputs at a short run as at a larger run: product size and load, tray and sleeve dimensions, materials, finish, artwork status, insert and delivery requirements.
If a launch date is fixed, work backwards from the date a finished sample must be approved, not only from the intended delivery date. Allow time for structural development, artwork preparation, proofs, sampling, production, assembly and delivery. The available route and factory schedule must be confirmed for the actual job.
Ask whether quoted pricing includes samples, dielines, plates or tooling, printing, assembly, inserts, overages, outer cases and delivery. This is especially important with a two-component pack because it is easy to compare one quote for an empty tray and sleeve with another quote that includes a fitted insert and completed pack-out.
If the pack will be assembled by your own team, ask about flat packing, bundle count, assembly instructions and expected handling. If it will arrive assembled, ask about pallet configuration, storage volume and outer-case protection.
Keep artwork and structure changes controlled once sampling has begun. A different coating can alter surface friction. A taller cap can change tray clearance. A new ribbon color can involve a different packing step. A revised barcode may require a new placement check.
None of these changes is necessarily difficult, but each should be checked in the real assembled format rather than treated as an isolated change. A documented sample and approval process helps prevent late changes from affecting fit, opening or delivery timing.
Common specification mistakes to avoid
The first common mistake is measuring only the product’s broadest outside dimensions. The tray must account for the product orientation, removable caps, labels, protective pouches, inserts and the space needed to take the product out.
The second is treating the sleeve as a decorative band with no tolerance requirements. The sleeve has to slide over the real tray, final surface finish and any wrapped construction. The third is approving artwork from a flat screen without reviewing fold, seam, trim and opening positions on the final dieline.
Another mistake is expecting one pack to handle retail presentation, gift presentation and parcel shipping also well without designing a system for each role. A tray and sleeve can be a strong customer-facing pack and still need an outer corrugated or mailer component for transport.
Do not describe it as protective without defining the product, insert, shipper and route. Likewise, do not make broad food-contact, recycled-content or recyclability statements from the visible appearance of a board sleeve. Material attributes and end-of-life outcomes need application-specific support.
Avoid choosing an insert from a catalogue image alone. An insert should be developed around the product and packing process. A very tight cavity may make loading slow; an excessively loose platform can allow movement; a visually elegant insert can obscure the item when the tray opens.
Ask the people who will pack the product to test a small run. Their feedback often identifies a missing finger gap, a fragile corner, a difficult orientation or a component that needs a more obvious placement guide.
A final decision checklist
Before you select tray and sleeve packaging, answer the following questions in order. What must the customer see before opening? What must stay aligned inside the tray? How will the customer grip and remove the product?
What information must be visible when the sleeve is closed? What finish or tactile effect directly supports the brand? Will the pack be displayed, gifted, stored or shipped? Which component is responsible for each of those jobs? These questions keep visual decisions connected to operational choices.
Then validate the decisions with a finished sample. Check the closed appearance, slide action, product fit, insert, shelf orientation, barcode area, scuffing, packing process and outer transport system. Photograph or record the approved configuration so a later order starts from an accurate reference.
The purpose of a custom tray and sleeve box is not simply to add a second component. It is to make the product feel organized and intentional from the first view through to removal. When the structure supports that outcome, it can be a practical, distinctive retail and gift-packaging format.
Printing and product information
The sleeve is usually the principal print surface, so it should carry the strongest brand, product and variant cues. The tray can provide contrast, an interior message or a supporting product arrangement. Use the approved dieline to keep critical type clear of seams, folds, pull features and edges likely to scuff.
A sleeve often has a visible seam or glue area, so the artwork should account for it instead of treating the outer panel as one uninterrupted rectangle. Review the printed sample in the closed and opened states.
A tray-and-sleeve pack may be an outer presentation layer around individual product cartons. The individual unit still needs the information a customer requires after the sleeve has been removed. For a broader consumer-facing carton decision, see . This separation allows the sleeve to focus on the collection or campaign while the product carton carries product-specific information, variant detail and any required labels.
If a barcode is printed on the sleeve, reserve a flat, high-contrast area away from seams, curves, foil-heavy artwork and high-wear edges. Barcode performance depends on the final substrate, print, coating, placement and scanning environment. Confirm the retailer's requirements and verify the final production configuration rather than relying on the way the code looks in a digital proof.
What to include in a quote request
Product dimensions, weight, fragility and preferred orientation.
Tray internal size, sleeve coverage, opening direction and pull feature.
Board or rigid construction, printed wrap, finish and color requirements.
Insert, divider, tissue or product-retention requirements.
Artwork status, barcode needs, retailer requirements and approval owners.
Whether the pack ships flat, assembled, loaded or inside an outer case.
Quantity, destination, target date and physical-sample needs.
A quote is most accurate when it defines the complete packaging system rather than an exterior size. Do not assume a board grade, price, lead time, minimum order quantity, food-contact suitability or shipping performance before a supplier has the product, structural and logistics details.
Ask what is included in the proposal: tray, sleeve, insert, print, packing, outer case, proof and sample. This makes it easier to compare options without overlooking a component that affects the customer experience or delivered cost.
Frequently asked questions
Are tray and sleeve boxes rigid boxes?
They can be made as rigid construction, but the term describes two components: a tray and sliding sleeve. Light folding-carton versions are also possible. The product, finish and route determine the suitable construction.
What products work in tray and sleeve packaging?
Products that benefit from a controlled reveal, stable tray position and visible outer sleeve can be a good fit. Test the actual size, weight, insert and opening sequence before choosing the format.
Can a tray and sleeve box be shipped directly?
It can be part of a shipping system, but it should not automatically be treated as the outer parcel pack. Use a suitable shipper and assess the complete configuration for the expected route.
Can tray and sleeve boxes use inserts?
Yes. Inserts, dividers and platforms can retain or separate products. Select them for a specific product-control need and test them with the finished tray and sleeve.
What makes a tray and sleeve quote accurate?
Product data, tray dimensions, sleeve coverage, material, insert, artwork, quantity and route-to-customer information allow a supplier to recommend a complete system.
Design the tray and sleeve as one system
A custom tray and sleeve box works when the inner tray, outer sleeve and product arrangement support the same customer experience. The tray should hold the item, the sleeve should open smoothly and communicate the brand clearly, and the outer shipper should handle transit where needed. Confirm these decisions with a complete physical sample before production. That gives the product visibility and controlled reveal of a tray-and-sleeve pack without compromising fit, information or practical handling.
The most efficient development path is to begin with the finished product and a clear package role, then make the structural choices in sequence: tray size, sleeve coverage, product retention, artwork zones, finish, packing method and outer delivery protection.
Each choice should be visible on the sample that is approved. This avoids treating the design, print and logistics teams as separate stages of one job. A tray-and-sleeve pack is successful when it is easy to recognize on shelf, satisfying to open, straightforward to pack and appropriate for the way it is distributed.
Keeping that practical sequence in the brief makes a premium-looking result easier to repeat across product variants, seasonal sets and future reorders.